In previous part, i have shown how to hosting website using AWS S3. In this part, i am going to show how to configure Amazon Route 53 as your Domain Name System (DNS) provider. If you want to serve content from your root domain, such as demosite.com, you must use Amazon Route 53. You create a hosted zone, which holds the DNS records associated with your domain.
Step 1: Create a Hosted Zone for Your Domain
Assuming you already register domain in Route 53. Go to Route 53 -> Hosted zones -> Create Hosted Zone :

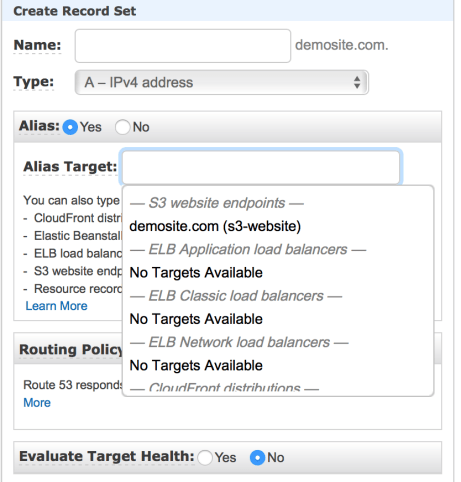
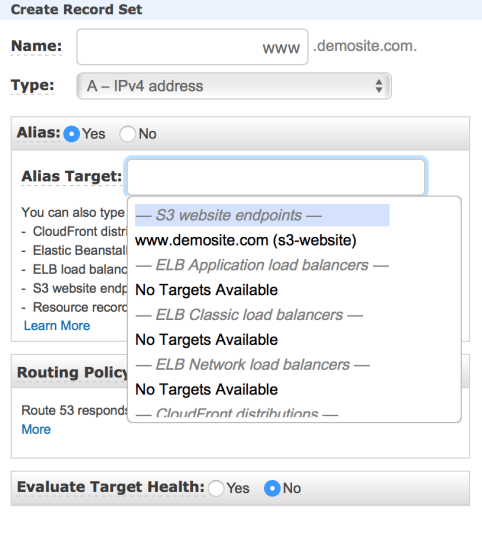
Step 2: Add Alias Records for demosite and http://www.demosite.com
The alias records that you add to the hosted zone for your domain maps demosite.com and http://www.demosite.com to the corresponding S3 buckets. Instead of using IP addresses, the alias records use the Amazon S3 website endpoints. Amazon Route 53 maintains a mapping between the alias records and the IP addresses where the S3 buckets reside.
In Hosted zones, choose your domain name -> Create 2 Record Sets :
and
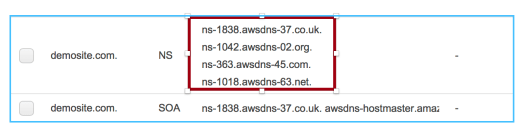
Step 3: Add name servers for domain
To switch to Amazon Route 53 as your DNS provider, contact your DNS provider and update the name server (NS) record to use the name servers in the delegation that you set in Amazon Route 53. Go to Domains – > Registered domains -> Choose domain name -> Add or edit name servers and update your name servers found in Hosted zones:
Done, now you can test it with url: http://demosite.com or http://www.demosite.com
Note: Creating, changing, and deleting resource record sets take time to propagate to the Route 53 DNS servers. Changes generally propagate to all Route 53 name servers in a couple of minutes. In rare circumstances, propagation can take up to 30 minutes.
